by Ivonne Vazquez
Unused materials for a different project turned into an opportunity to create a vertical garden. The project: a wall of mint. “Wha-aat?” you say with great interest while conjuring images of the delightful possibilities, the scent of mint swirling about in your thoughts.
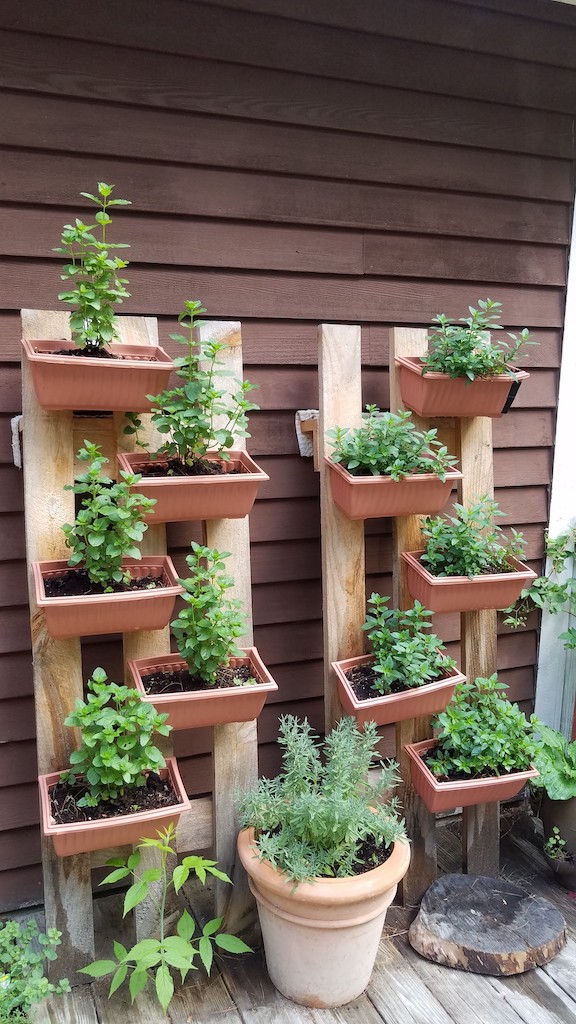
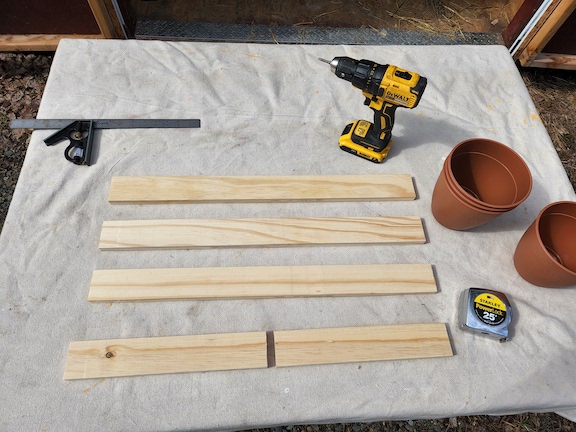
With some pieces of wood, plastic plant pots, a few screws, washers and a short length of chain you, too, may be able to indulge in a vertical garden project. You will need:
- Four equal lengths of wood. In this case I used scrap wood measuring 2.5 inches wide x 26 inches long.
- Three 6-inch plastic plant pots. Reusable, easy to clean, lightweight and perfect for a vertical garden project. (I purchased mine at the “not quite dollar store” where everything was $1.25.)
- Eleven 1-inch wood screws.
- Three 1.25-inch metal washers.
- Two ½-inch metal washers.
- 12-inch length of small link chain (optional, for hanging).
- Drill with Phillips head screwdriver bit. Or manual screwdriver (you may need pilot holes).
- Measuring tape.
- Pencil.
- Handsaw or power saw.
- A level surface.
Step 1: Gather tools, hardware, pots and pieces of wood; lay them out. Set aside three pieces of wood, cut the fourth in half.
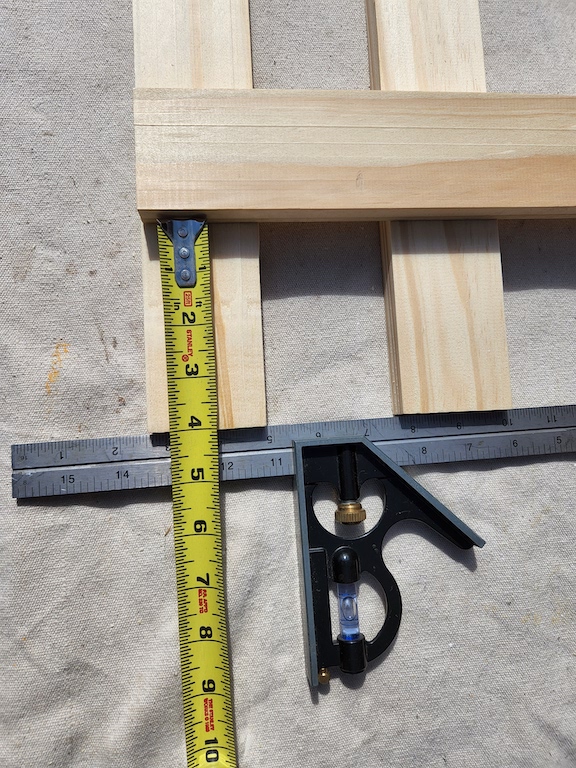
Step 2: Take the three equal lengths of wood and place them evenly (lengthwise, these are your verticals) and a few inches apart (widthwise). Place the half-cut pieces (horizontals) across the top and bottom (measuring 4 inches from each end). Once you have measured for placement and levelness, draw guide lines (top and bottom) before next step.
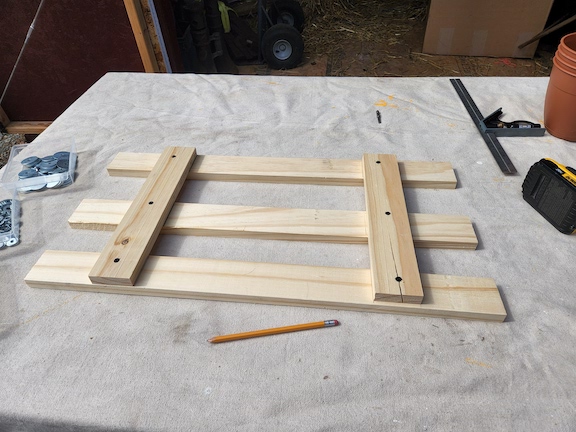
Step 3: Screw the horizontal pieces (using your guidelines). Be careful not to split the wood.
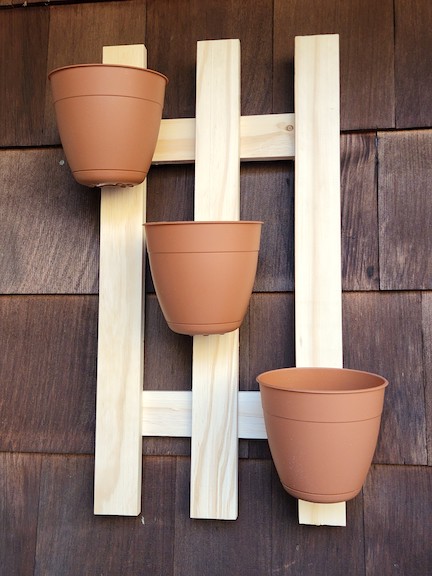
Step 4: Once you have the horizontal pieces in place, turn the project over. The plant pots will be affixed to the front.
Step 5: Using a screw and a 1 ½-inch metal washer, fasten the first pot onto the support. Place the pot where the screw will go through both the vertical and horizontal pieces for added strength. Screw the pots in this order: top, bottom, middle (last for equidistant placement).
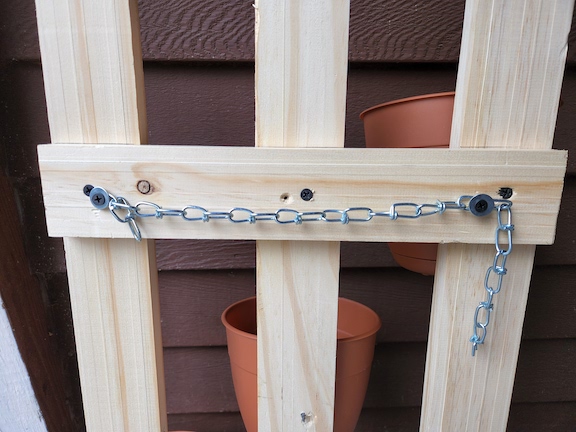
Step 6 (optional): Add the length of chain with two screws and ½-inch metal washers to have the option of hanging the project.
Project time: 1 hour. Cost: Less than $10 as I repurposed scrap wood and had the hardware on hand.
Ivonne Vazquez is passionate about native plants, herbs, pollinators, DIY, sustainability, the environment and the outdoors. She is most often found outside using her skills as a Master Gardener, Licensed Registered Maine Guide and basic gardening instructor at Bangor Adult Ed. Vazquez co-owns Bas Rouge Farm & Forge in Orono, Maine.
This article was originally published in the summer 2022 issue of The Maine Organic Farmer & Gardener. For more gardening resources, sign up for MOFGA’s Gardener Newsletter.