By Caleb Goossen, Ph.D., MOFGA Crop Specialist
Starting seedlings indoors allows you to create a controlled environment that is ideal for germination and early growth. In addition to long-season crops, like Brussels sprouts and artichokes, that require many days to reach maturity, we want to give some crops time to grow as large as possible before a critical period. For example, starting heat-loving crops indoors early on may allow you to begin harvesting from them earlier and subsequently for a longer harvest window before they are slowed down, or killed, by cooler temperatures in the autumn. Similarly, you want long-day onions to grow as many healthy leaves as possible before mid-summer daylength triggers them to start directing energy towards growing a bulb. Giving any plant a head start before it goes into the garden can help give it an advantage over weeds, pests and diseases. Furthermore, when transplanting you can easily achieve exact spacing, which promotes airflow and reduces resource competition among plants. Another reason for starting seedlings that we don’t acknowledge enough is the fun of rushing spring a bit and feeling like you’ve got your garden going in March.
Crops that are often more worthwhile to direct seed include faster growing crops (lettuce mix, arugula, radishes, turnips) and crops that are difficult to transplant (crops with a tap root like carrots and parsnips).
What Do I Need to Get Started?
Gearing up to start seedlings can range from low-cost options to expensive and complicated setups that are closer to what is used for growing cannabis indoors. The bare necessities for starting your own seedlings are: some sort of potting media, water, “enough” heat and light, and, of course, seeds. Some crops only require the bare necessities before they can be transitioned outdoors while others may require some additional considerations. As with any hobby or lifestyle pursuit, you may find certain upgrades over time add to your enjoyment.
Potting media — Three primary approaches are purchasing a peat- or coir-based mix or a compost-based mix, or making your own mix. Homemade mixes can be done well, but they can also be difficult. I recommend that beginning gardeners use a purchased mix.
Peat- and coir-based mixes use peat or coconut coir as the main body of the mix, providing a matrix for plants to root into, but necessitate some form of added fertilizer as the base essentially contributes none. These mixes frequently have fertilizers mixed in, either conventional or organic formulations, but some may contain very few nutrients and require supplementation. An easy way to check for organically approved sources of fertility in a mix is to look for the OMRI (Organic Materials Review Institute) logo, one of several ways to indicate approval for use in organic systems.
The best-performing compost-based potting mixes typically also contain peat or coir to improve drainage and aeration, but much, or all, of the fertility is coming from compost. Some compost-based mixes also contain fertilizers and other amendments that may be present in any potting media, like perlite (helps with drainage and aeration) or biological amendments (beneficial bacteria or fungi). A primary difference between peat/coir-based mixes and compost-based mixes are that compost mixes are expected to be “alive,” with the intent for beneficial microorganisms to outcompete potential disease organisms. Because of the way that peat forms, it is considered to be sterile for most intents and purposes (though it is not typically sterilized). Peat/coir-based mixes should be maintained in a manner to discourage disease organisms, as there will be few beneficial microbes to compete against them, unless intentionally added. That can also be true of compost-based mixes if they’re managed in a way that favors disease organisms over beneficial ones (i.e., poorly aerated or too cold).
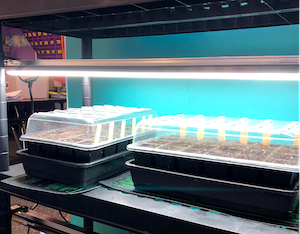
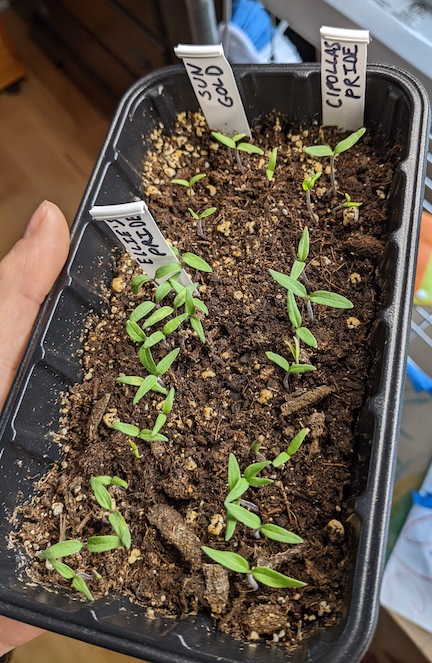
Containers — While containers are not strictly necessary — some growers prefer to create “soil blocks” — many folks like to use containers made of plastic, terracotta, peat or folded newspaper to hold their potting media. My number one recommendation is to focus on drainage and subsequent water catchment. Saturated potting media leaves no space for oxygen to reach plant roots, can reduce nutrient availability, favors disease organisms and is probably the number one killer of indoor seedlings. No matter what container you use, be sure to maximize drainage pathways while also considering where that water will go and how you will catch it before it lands on your floor — without allowing it to pool and keep the potting media saturated. If using peat pots, or homemade containers, be sure to cut generous drainage holes in the bottom and sides if needed, as these can retain water surprisingly effectively. For most of my own garden starts, I use rigid plastic seedling trays, with generous cutouts for drainage and “air-pruning” of roots, and elevate them on small pieces of wood above the drainage water that collects in solid plastic trays below them.
Light — “Enough” light can vary from a very sunny windowsill for a cold-tolerant seedling that will be transferred outdoors soon, to racks of lights that are so bright you need to turn a few off before working with the seedlings. I often see folks strive for “the best” way to replicate sunlight and the segments of the light spectrum that plants use most efficiently for photosynthesis. While this isn’t a bad thing, and could be important if growing a plant to maturity indoors, I think this approach often adds unnecessary expense when simply starting seedlings. My rule of thumb is to provide more light than you think you need, but start with what you already have. If you own “grow lights” that’s great, but if you don’t, I recommend simple white LED shop lights, which are now easily found at affordable prices. Hang lights a few inches above seedling leaves if you can, and prepare to raise them as the seedlings grow. One thing to watch for with LED lights is they sometimes have a narrower, more focused beam of light than fluorescent tubes. They may need to be hung higher and/or doubled up to provide even light coverage.
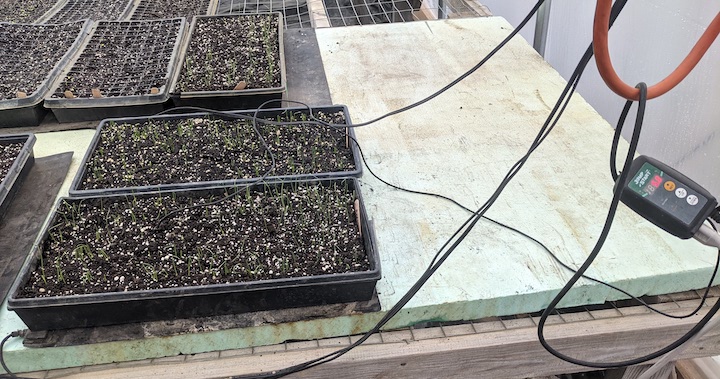
Heat — What qualifies as “enough” heat varies between plant species and stages of growth. Optimal temperature is most critical for germinating seeds. Different species have different temperature ranges in which they will germinate fastest, and rapid germination is key to getting a seedling up and growing before disease organisms can infect it. Seedlings have a greater tolerance for a range of temperatures once germinated and producing their own energy from their leaves. Common household temperature ranges are often suitable — though be aware that the temperatures you and your seedlings experience may be different, particularly if they are located next to windows or in a less trafficked area. Heating mats can be helpful for germinating seeds of heat-loving crops, like peppers or eggplants. If using a heating mat, it can be helpful to buy a thermostat with a soil probe to keep the potting media within a desired temperature range. For my own garden starts, I place freshly seeded trays on a high shelf near the ceiling of a room where my wood stove keeps things quite toasty, and move the trays to lower shelves after the seedlings have emerged. Because germinating seeds don’t typically require light, they can usually be placed anywhere in the house that is warmest — for many gardeners that is on top of the refrigerator — and transferred elsewhere after emergence.
Seeds — Aim for the best quality seeds you can purchase or produce. See the article “Selecting Seeds for the Garden” in the winter 2022-23 issue of The MOF&G or on mofga.org for more discussion on seed selection.
Fan — While certainly not a requirement, using a fan to circulate air around seedlings will promote faster drying, help to reduce legginess somewhat, and begin to harden off seedlings by simulating the drying winds they will encounter outdoors.
When to Start Seedlings?
It’s always best to work off of your own records but any regionally appropriate seed starting calendar will be a great place to start (see MOFGA’s “Seed Planting Calendar” in the winter 2022-23 issue or online). Often, getting seedlings started later than you wanted is better than too early — I would rather a small seedling go outdoors in ideal growing conditions than a leggy seedling with more top growth than its small, or pot-bound, rootball can support, potentially leading to transplant shock and delayed establishment.
Common Issues with Seedling Production
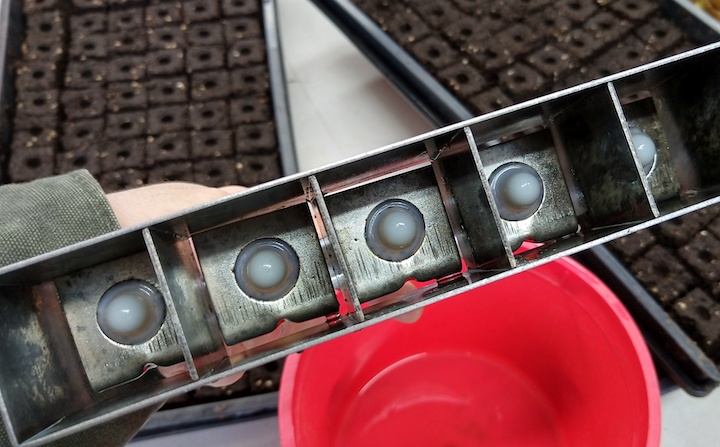
Damping off — Damping off is a general term for any disease that kills seedlings before germination or shortly afterwards. Damping off can be worsened by overwatering and insufficient drainage/aeration. Sowing seeds in small containers and then pricking out seedlings can help mitigate this issue. This method saves space early on, circumvents issues that stem from seeds or seedlings being placed in containers that are too large for them (and thus remain wet for too long), and can mitigate germination issues from poor-quality seed by allowing you to seed far more individuals than you intend to pot up and grown on. For more information on damping off, refer to MOFGA’s seedling problems fact sheet. (Sign up for MOFGA’s Pest Report for timely information about seedling issues in season.)
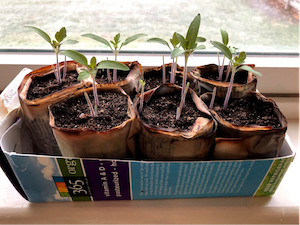
Leggy seedlings — Leggy seedlings are thin and tall, usually having stretched in search of more light (etiolation). Insufficient light, crowding or excessive nitrogen can make this worse, as can a large differential in nighttime versus daytime temperatures in some species. Legginess is much easier to prevent than to deal with after the fact. Be sure to provide enough light, space out seedlings when they begin to crowd if you can, and do your best to avoid big temperature swings between day and night — this can be achieved by reducing daytime temperatures or increasing nighttime temperatures, just remember to keep seedlings warm enough to avoid chilling injury and that warmer temperatures will speed seedling growth (for better or worse).
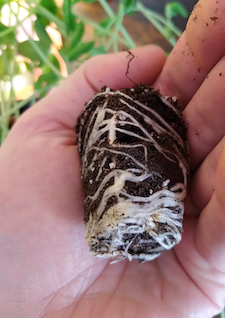
Overgrown/root-bound/pot-bound — Seedlings that have outgrown the space available to them don’t often die, but they can suffer or become stunted. As roots run out of potting media to explore for nutrients, they can begin to spiral around the perimeter of their containers — which can delay or limit their ability to easily root out into the surrounding soil after being transplanted. Soil blocks, and some specialized seedling containers, are designed to prevent this by “air-pruning” of roots — as root tips encounter air at the edge of the potting media they die back slightly, and new root growth is redirected to new lateral branching within the potting media. Even in a system with air-pruning to prevent root-bound rootballs, an overgrown seedling may have large top growth, with a greater demand for water after transplanting than can be easily met by a relatively small rootball, until the roots are able to grow out into the surrounding soil. In these cases, it is important to harden off seedlings carefully and keep a close eye on recent transplants, and it can sometimes be helpful to trim back seedlings at planting.
Not hardened off enough before transplant — Seedlings grown indoors are not acclimated to the intense sunlight and cold drying winds that are typical of springtime gardens. It is best to gradually increase the amount of time that seedlings are exposed to direct sunlight and windy conditions, over several days or more, to allow them to acclimate to outdoor conditions before being planted out.
Starting your own seeds may feel like one of the key elements of being a gardener — I always enjoy it as a way to start my spring regardless of the outdoor conditions — but it doesn’t always make sense to start all of your own seedlings. Every spring, MOFGA updates a map of locations where one can buy certified organic seedlings (mofga.org/mofga-seedling-map), and at the very least it’s nice to know where to go as an “insurance policy” if your own starts do poorly!
To learn more about starting seedlings indoors, check out MOFGA’s webinar on growing seedlings indoors on YouTube.
This article originally appeared in the spring 2023 issue of The Maine Organic Farmer & Gardener.