 |
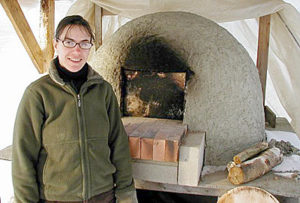
| MOFGA Journeyperson Kendra Michaud with her earth oven. Photo by Clayton Carter. |
by Kendra Michaud
When the growing season here at MOFGA slowed down last fall, Clayton and I began building a wood-fired oven behind the farmhouse. Our reason was simple … I wanted to make good bread for us and our community. I have loved baking since I was very young, when I was inspired by my mom’s wonderful, homemade bread. After trying other careers, I decided to pursue my love of baking, and have been doing so professionally for over two years. Although I have taken a few classes and worked at several bakeries, I have learned the most about bread, especially sourdough bread, by baking at home – day after day, week after week and month after month.
Until I built the wood fired oven, I had been baking bread in regular home ovens. While I was able to produce some delicious and beautiful breads, I found that I was often fighting the oven in order to get the qualities that I value in bread: high loft, a strong, crackling crust and a deep, caramelized color. (And after all the effort, I got only two loaves of bread at a time!) Eventually, I decided that a wood-fired oven was the best way to take my bread to the next level. (And for me to make more loaves at once.)
I decided to follow the simple oven plans offered by Kiko Denzer in his book Build Your Own Earth Oven. The oven dome is made from clay and sand, and the oven design is a single chamber used both for firing and baking. Such ovens have been used for millennia, and I feel proud to continue this tradition.
To use the oven, I light a fire and allow it to burn for a matter of hours, heat soaking into the walls all the while; the ashes are scraped out when the fire is dead, and, finally, the oven chamber is filled with bread. The heat stored during the firing now radiates back into the chamber and bakes the bread, often at temperatures of 600ºF or more.
I make all of my bread from scratch, so it seemed fitting that I should also make my oven from scratch. An oven constructed of simple, natural materials seemed to best suit the oven site here at MOFGA. Clayton and I decided on a location for the oven and dug a shallow hole, filling it with gravel. Over this basic foundation Clayton and my dad built a simple shed to cover the oven site so that the oven can be used in bad weather. It ended up being a good idea to build the roof first, because I was also able to build the oven in bad weather. Moreover, the nature of earth ovens leaves them vulnerable to erosion by the elements, making a roof (no matter how rudimentary) perhaps the most important part of the oven structure.
I made the oven base by dry stacking concrete blocks into the shape of a horseshoe, about 3 feet high, leaving the front wall open so that the space under the oven can be filled with firewood. Clayton placed thick 4×5 boards across the top of the base and then cement board on top of the wood. (Cement board is reinforced cement that comes in long, flat boards, as plywood does; it’s used in high heat situations, such as behind wood stoves in houses.)
Since I was concerned with heat escaping through the floor of the oven, I placed a piece of hard, high temperature, foam insulation on the cement board. On top of this insulation, I dry fitted two layers of firebrick, the topmost of which would become the floor of the oven.
Then the fun began – constructing the dome! (Well, it would have been fun had it not been late November and really cold outside.) I used damp sand to make a dome-shaped form for the baking chamber, making sure it was the exact height (17 inches) and width (30 inches) that I wanted the inside of the oven to be. When this form was complete, I began work on the first layer of the dome. This layer, a mixture of clay and sand, was packed on to a thickness of about 5 inches. The second layer, made with clay, sand and straw, was another 5 inches. Finally, I smeared on a thin layer of very wet clay mix to make a smooth outer surface. With the dome complete, Clayton and I waited for the clay to firm up enough before we cut a hole for the door (about 10”x14”) and dug out the sand that was used for the form.
Had our timing been better, and had Clayton and I built the oven in warmer weather, we would have simply walked away at that point and waited for the oven to dry more thoroughly. We had been told that firing an oven too soon could damage it severely, but we were also worried about the damp dome freezing, which we felt could be equally disastrous. Hoping to straddle this fine line, we began to build very, very small fires only a couple of days after digging out the sand form. We kept these tiny fires (built and contained in an old coffee can) going for almost a week, and this seemed to work quite well. In early January, we were building larger and larger fires, and on the 7th, I made my first batch of bread. We are very pleased with the oven and are enjoying the wonderful, wood-fired oven bread.