 |
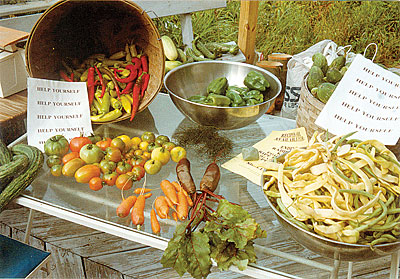
| Extra veggies were offered for the taking at Simply Grande Gardens CSA. Photo by Jean Ann Pollard. |
By Jean Ann Pollard
From 1995 to 2005, my husband, Peter Garrett, and I ran a CSA (Community Supported Agriculture) garden in Winslow, Maine. Once a hayfield, our land was perfect for growing vegetables: It was flat, cleared and had never been treated with pesticides.
We began with a 45- x 200-foot area and expanded until we cultivated 1-1/2 acres and fed 20 families with an abundance of summer produce from June through mid-October, plus winter vegetables for an additional five or six families. Full shares provided food for a family of four; we also offered half-summer shares.
Ultimately, hip replacement surgery put an end to my part of the enterprise. Otherwise, we’d still be going strong!
For aspiring CSA growers, we offer these tips:
1. Find a piece of cleared, level land and have the soil tested. (In Maine, soil testing boxes and forms are available from the Soil Testing Service at the University of Maine, Orono (https://anlab.umesci.maine.edu/), and from county Cooperative Extension offices; in other states, check with the county Cooperative Extension office.) Use compost as much as possible to amend the soil, then add nutrients as recommended and have the ground plowed, disked and rototilled. MOFGA has several Fact Sheets that help beginning growers understand soil tests and organic soil amendments. (See www.mofga.org)
| Simply Grande’s Timetable This was our CSA timetable one year. Dates will vary, depending on the garden location and weather. Early February – Start onions and leeks inside Mid-March – Start eggplant, lettuce, peppers and tomatoes inside April 1 – CSA applications and deposits due from shareholders April – Spread compost, rototill, weed April 13 or 20 – Direct seed greens, mesclun and spinach under row covers May 4 – Plant peas and onion sets May 15 – Full payment due from shareholders Memorial Day weekend – Major planting event June 1 and 15 – Probable first dates for veggie pickup June 29 – Weekly pickup starts (sooner, if weather is warm) July – Peas, beans, beet greens, broccoli, mesclun and lettuce ready August – Beans, baby carrots, mesclun, peppers, potatoes, radishes, cucumbers, squash, etc., ready Early October – First frost likely. Harvest remaining peppers, tomatoes, etc. October – Harvest winter vegetables and store in root cellar Mid-October – Last summer-share pickup date; first winter shareholder monthly pickup; end-of-season potluck for all shareholders; pumpkin pickup October, anytime – Pick-your-own late-season greens and herbs November, December, January, February, March – Monthly pickup of winter shares Mid-January – Midwinter potluck; choose seeds for current year’s planting |
2. Create a garden that’s not too big to maintain. Two of us, with weekly help from a few CSA members, were able to work the 1-1/2 acres that fed approximately 65 people (with some vegetables left over for me to can).
3. Become organically certified. Certification in Maine is available through MOFGA Certification Services LLC. (See www.mofga.org)
4. Attract shareholders by handing out well-written, attractive brochures to friends and neighbors showing which vegetables will be available throughout the season and when each will be ready; an order form indicating prices per share or half-share; and information about work that customers may do or are expected to do as part of the cooperative venture. Our CSA shareholders could participate as paying or working members, and the brochure helped gardener and shareholder alike understand how things worked.
5. Grow many varieties of the vegetables that ripen well in Maine. This is for taste as well as security: If one crop fails, you’ll still have others for your customers. At Simply Grande, we grew about 90 varieties of the 25 types of vegetables that grow well in Maine, as well as mesclun mixes, pick-your-own herbs and edible flowers.
6. Draw a garden plan on paper. Our plan for our 45- x 200-foot garden showed it divided by a wide path down the middle. Then 20-foot-wide sections on either side were divided into 3-foot-wide beds, with 1-foot walking paths between them. Soil from the path was shoveled or raked onto the beds to raise them slightly. Other sections measuring 40 x 20 feet were not raised but were mulched with plastic or left clear for potatoes. (See 9, below.)
7. Plan to buy seedlings unless you have a greenhouse where you can sprout them yourself. Some items, such as onions and leeks, need to be started in February. Others can be started from March to mid-May.
8. Create a schedule for growing seedlings indoors, for transplanting them into the garden and for direct seeding outdoors.
9. Plant the garden. Using a wheeled seeder, we planted three or four straight rows of beets, carrots, herbs and other small seeds in each 3-foot-wide bed. These rows were 8 inches apart to provide a perfect space for hoeing between them. (See 14, below.) Onion seedlings were spaced 3 rows per bed; seeds for beans or peas, two rows. One 20- x 40-foot plastic-mulched section was interplanted with tomato, broccoli, cauliflower and cabbage seedlings through holes punched in the plastic with a posthole digger. A similar section held cucumbers and summer and winter squashes. Potatoes had their own non-mulched area.
10. Rotate crops each year so that members of one family aren’t grown in the same area two years in a row (or, ideally, longer). Move members of the nightshade family (i.e., potatoes, tomatoes, eggplants and peppers) to a different bed each year. Plant heavy feeders, such as corn, after a cover crop such as hairy vetch that adds nitrogen to the soil. (Eliot Coleman’s book The New Organic Grower describes vegetable crop rotation and cover cropping.)
11. Compost. Recycle lawn clippings, weeds and meatless kitchen waste in a compost heap or bin, let the compost “cook” until it’s broken down, then spread it where needed.
12. Have water available close to the garden. Plant seedlings with a trowel and water them in with a dribbling hose as you transplant, to give them a good start. During dry summers, irrigation may be necessary.
13. Invest in a shed where you can store gloves, sun hats, spades, forks, rakes, hoes, rolls of plastic, row covers (in rodent-proof containers), buckets, seedling trays, labels, clippers, hammers, posts, electric fencing, a rototiller, wheeled seeder, lawnmower, wheelbarrows, wooden stakes, wire supports and other items.
14. Remove perennial weeds such as witch grass in the spring by digging them out with a fork before rototilling. Plant spring crops in straight rows as described in step 9, and about 10 days later, on a sunny morning, weed shallowly with a collinear hoe. Do this two more times, a week apart each time, and most of your weeds will be gone within the first month.
15. Arrange tables for harvested vegetables. We used two old screen doors set across saw horses where we could divide vegetables into shares and rinse them when needed. A big, old sail on posts provided shade. Shareholders purchased two large coolers. Each week they would bring an empty one and exchange it for the second, which we had filled.
16. Include recipes with your produce. I turned these into two cookbooks (The Simply Grande Gardening Cookbook and The New Maine Cooking) as well as many newspaper and magazine articles.
For resources relating to CSA farming, see www.mofga.org, “Resources,” and/or contact MOFGA’s organic marketing coordinator, Heather Omand, at [email protected], 207-568-4142.