 |
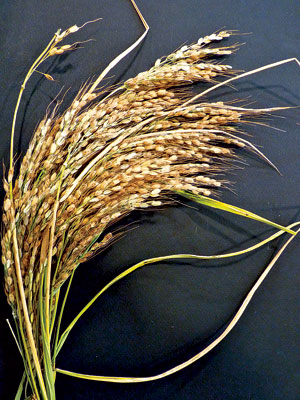
| Roberta Bailey grew ‘Duborskian’ rice in Maine in the summer of 2010 and displayed it in the Common Ground Country Fair Exhibition Hall. English photo. |
By Roberta Bailey
I grew rice this year! And I actually harvested mature rice heads.
The entire process entertained me all summer. It has been ages since I grew something about which I knew absolutely nothing. It gave me a glimpse into the world of the new gardener, packet of seed in hand and no idea what comes next. That newness, that blank slate, kept me grinning and marveling.
It all started last winter when I was handed two packets of rice and was asked if I was interested in trialing the varieties for Fedco Seeds. Always game for a new challenge, and having an interest in northern rice propagation, I agreed. The two varieties, ‘Carolina Gold’ and ‘Hmong Sticky,’ were from Southern Exposure Seed Exchange. I decided to order the five varieties being offered, with very little descriptive information, through the Seed Savers Exchange (SSE) members’ list: ‘Shan Red,’ ‘Basmati,’ ‘Golden Rose,’ ‘Duborskian’ and ‘Ohsawa Pearl.’
I don’t remember deliberating, but I must have decided to give the rice as much of a jump on the season as possible, because I started the plants in my greenhouse on April 29. I used 3-inch-deep flats and sowed the seed about 1 inch apart in rows spaced a few inches apart. Most germinated in seven or eight days, looking very much like a shoot of wheat or oats. ‘Shan Red’ took two weeks. I wondered if the seed was older or if the variety needed something my greenhouse was not providing. If that was the case, good luck in our Maine summer.
Over the next month, the seedlings formed three or four shoots, and I noticed that their stem and leaf structure was very flat, not rounded like some other grains. They were quite green and seemed happy. So far so good. Even ‘Shan Red’ was catching up in size after its slow start.
I had heard that rice can be grown on dry land and does not need to be in standing water. Water is used to control weeds, as rice can tolerate water better than weeds. I decided to plant in a section of the garden that had had standing water most of the previous summer. Wet summer or dry, it should fare well. I have rich but heavy clay soil. Even in a dry year, it rarely needs to be watered.
Again, I don’t remember the thought process, but I decided to make slightly raised rows. As the land had been in buckwheat followed by oats the previous summer and fall, I thought that few nutrients needed to be added. I did add some Azomite and kelp meal and a small amount of compost in hopes of providing all the nutrients the rice would need; and I soaked the soil in the flats with fish emulsion solution – something I do to help all my seedlings through the transplant process.
I carried my flats to the prepared rows, set them down, wrote out the plant markers – and then it hit me: I had no idea how to plant rice. I had no idea what the plant looked like or how big it would get or how much room to give it. I went inside and Googled the rice article that had run in The MOF&G (“Could Rice be the Northeast’s Newest Grain Crop?” by Cheryl Bruce, Sept.-Nov. 2008; www.mofga.org/Publications/MaineOrganicFarmerGardener/Fall2008/Rice/tabid/983/Default.aspx). It didn’t give me the answers I needed, nor did the Southern Exposure site.
The garden was pulling me and I decided to wing it. It’s a grain. Think of how big wheat or barley plants get. So I started pulling apart plants and setting them in rows about a foot apart. I was grinning. For all I knew, generations of rice farmers were watching over my shoulder and laughing, just like a local farmer laughed when I planted my wheat in rows. It is good to be humbled.
The transplants seemed to settle in fine, then all varieties turned a bit yellow. Oh well, so much for rice in Maine. Or maybe it was transplant shock. Or a reaction to being mulched with grass clippings. I later learned that rice is traditionally started in some form of plug, then transplanted, so my plants may have been recovering from having their roots disturbed. After a few weeks, the plants greened up and began to grow. ‘Carolina Gold,’ ‘Hmong Sticky’ and ‘Duborskian’ were the most vigorous, forming 10 to 20 stems per plant. As I weeded I noticed how flat the stems were, almost like lemon grass.
On August 5, ‘Duborskian’ started to push forth grain heads on round stems. I was elated. It had two months to finish. Maybe I could grow rice in Maine. ‘Carolina Gold’ and ‘Hmong Sticky’ were lush but showed no sign of sending up seed heads.
Over the next two months, I watched the ‘Duborskian’ grain kernels fill out and get hard and yellow as they dried. Each plant sent out 10 or 15 seed heads. Each seed head had about 100 short, fat grains of rice. The SSE members’ list noted that ‘Duborskian’ is a short season Russian variety. A member had grown it in Massachusetts.
On September 20, ‘Hmong Sticky’ started to send up seed heads – possibly too late, as it took close to two months for ‘Duborskian’ to finish, but by October 17 this variety was hardening enough that I anticipated getting some mature seed. Maybe avoiding transplant shock would have helped produce seed sooner.
On October 2, shoots appeared on ‘Carolina Gold.’ The plants withstood temperatures in the low 30s.
In fact, the plants had withstood about five nights in the low 30s by October 17. Some looked a bit bleached, as if they had tip burn.
I harvested the seedhead by cutting the stalks at about 12 inches and then spread them to dry in the shaded area of my greenhouse. I have heard that rice seed needs to have its hull intact for good germination. I’ll store most of the grain for replanting, but I want to steam and eat some of it plain to get the full flavor of homegrown rice. If it is like any other homegrown grain, vegetable, fruit or nut, it will be a bit sweeter and bursting with more flavor than one could imagine possible. I may have to become a Maine rice farmer.
Perfect Rice Pudding
2 c. water
2 Tbsp. butter
1/8 tsp. salt or to taste
1/2 tsp. finely grated lemon zest
1 c. long grain rice
4 c. whole or low-fat milk
1/2 c. evaporated cane juice/sugar
1/2 vanilla bean, cut in half lengthwise
1 c. raisins
ground cinnamon
Combine water, butter, salt and zest in a 2-quart, heavy-bottomed saucepan. Bring to a boil, then stir in rice and return to a boil. Cover and simmer over very low heat for 15 to 25 minutes, until the water is absorbed. The heat can be shut off just before the water is gone.
Combine milk, sugar and vanilla bean in a 3-quart saucepan and bring to a simmer over low heat. Do not boil. Add rice mixture and raisins and simmer for about 20 minutes, stirring frequently, until most of the milk is absorbed and the rice is creamy. Transfer the pudding to a glass, ceramic or metal bowl and sprinkle with cinnamon. Cool to just warm and serve. Serves 6 to 7.
Indian Baked Rice
3 c. Basmati rice or long grain rice (about 1-1/4 lb.)
4 c. chicken or vegetable broth
5 Tbsp. vegetable oil
1/3 c. slivered almonds
1 large onion, halved lengthwise and sliced thinly crosswise
2 large cloves garlic, minced
1 small jalapeno, seeded and diced
1 tsp. garam masala spice
1 tsp. grated fresh ginger
1/2 tsp. salt
Rinse and drain rice. Place oven rack in middle setting. Preheat oven to 325. Bring stock to a simmer, reduce heat to low and cover pot, keeping a simmer.
Heat oil in a 4- or 5-quart, heavy, ovenproof pot (or transfer all to a baking dish later). In the heavy pot, over medium heat, add almonds and brown lightly for about 2 minutes. Remove and drain on a paper towel. Add onions to the pot and brown lightly. Add garlic, jalapeno, garam masala, ginger and salt, and cook, stirring frequently, for about 1 minute. Add rice and cook over low heat for about 3 to 5 minutes. Stir frequently. Add stock and simmer briskly for about 8 minutes. The top of the rice will appear dry. Cover the pot or transfer the ingredients to a baking dish and cover. Bake for about 20 minutes, until the rice is tender and the liquid has been absorbed. Remove the dish from the oven and let it sit for 10 minutes. Serve sprinkled with toasted almond slivers. Serves 8.
Thai Sticky Rice with Mangoes
3 c. sticky rice, soaked overnight in water or thin coconut milk
2 c. canned or fresh coconut milk
3/4 c. palm sugar or brown sugar
1 tsp. salt
4 ripe mangoes or sliced ripe peaches or papayas
Optional garnish: cilantro, mint or Asian basil sprigs
Steam the sticky rice until tender.
Meanwhile, place the coconut milk in a heavy pot and heat over medium heat until hot. Do not boil. Add the sugar and salt and stir to dissolve completely.
When the sticky rice is tender, turn it out into a bowl and pour 1 cup of the hot coconut milk over the rice; reserve the rest. Stir to mix the liquid into the rice, then let it stand for 20 minutes to an hour to allow the flavors to blend.
Meanwhile, peel the mangoes. The mango pit is flat, and you want to slice the mango flesh off the pit as cleanly as possible. One at a time, lay the mangoes on a narrow side on a cutting board and slice lengthwise about 1/2 inch from the center. Your knife should cut just along the flat side of the pit; if it strikes the pit, shift over a fraction of an inch more until you can slice downward. Repeat on the other side of the pit, giving you two hemispherical pieces of mango. (The cook gets to snack on the stray bits of mango clinging to the pit.) Lay each mango half flat and slice thinly crosswise.
To serve individually, place an oval mound of sticky rice on each dessert plate and place a sliced half mango decoratively beside it. Top with a sprig of mint or basil if you wish. Or, place the mango slices on a platter and pass it around, together with a serving bowl of rice, allowing guests to serve themselves. Stir the remaining sweetened coconut milk thoroughly, transfer to a small serving bowl or cruet and serve as an optional sauce.