 |
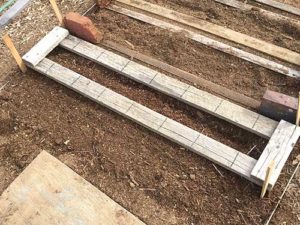
| Photo 1. |
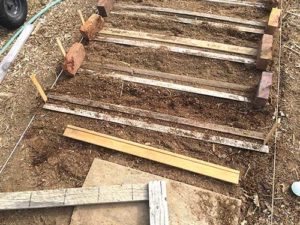 |
| Photo 2. |
June 1, 2020
By Jonathan Mitschele
Photos by the author
The older plaster walls in my 1850s farmhouse were made by spreading wet plaster on a framework of thin wood strips, or laths. I don’t know what folks shopping at Home Depot or the like buy lath for today, but I have hit on a way of putting it to good use in the garden: Placing lath strips on each side of a planted row of seeds, an inch or so apart, helps minimize whatever close weeding needs to be done when seedlings emerge. The paired laths, held in place with a couple of bricks, also create a beneficial microclimate, which is even more essential for my gardens given the many days of strong spring winds from all directions. The laths keep soil moisture levels higher, so I lose fewer seedlings due to drying out.
This is my process for sowing seeds and using laths:
• I use my planting frame to position row markers in place. (Photo 1)
• I position pairs of laths against my row markers. (Photo 2)
• I level the soil in the space between the laths, adding soil where needed to fill in low spots.
• I tamp the planting area lightly and then
• scatter seeds.
• I cover the seeds with soil, scraping off the excess; and
• I tamp again to compact the soil around the seeds.
I water the seed beds daily until seedlings appear, then as needed, and remove the laths when seedlings are off to a good start.
Wood lath is not cheap; when I wrote this in April 2020, the price at Home Depot was $13.98 plus tax for a 50-pack of 1/3-inch by 1 1/2-inch by 4-foot wood laths, but with a little care laths will last several years. Laths will work regardless of your row length, but if you plant in 4-foot-wide rows, as I do, these laths are the perfect length. Take them up and store them in a dry place after seedlings are well up so that the laths don’t warp or start to rot.