By Will Bonsall
Probably no single food has entrenched itself in the many cuisines of the world as much as the tomato. Before Europeans discovered the New World (that is, it was a first for THEM), this vegetable-fruit was restricted to the frost-free regions of Central America, where it can still be found growing wild. It was slow to catch on in Europe, considered unfit for human consumption. This has to do with its sketchy relatives, including tobacco and belladonna, all of which contain some toxic compounds in some parts of their tissues. So great was the resistance that Thomas Jefferson was still trying to promote them as a wholesome food from his Monticello gardens. This is a far cry to the present day: tomatoes are a favorite crop everywhere.
Tomatoes are generally classed as an annual, since their robust and rowdy growth is stopped short at the first frost. However, in warmer regions they are tender perennials, set back not by cold but by drought. They may be frost-tender but are definitely not delicate. What’s the most common weed in compost piles? What pops up profusely wherever treated sewage sludge is spread? Yup, those opportunistic vines thrive in the most undainty environments.

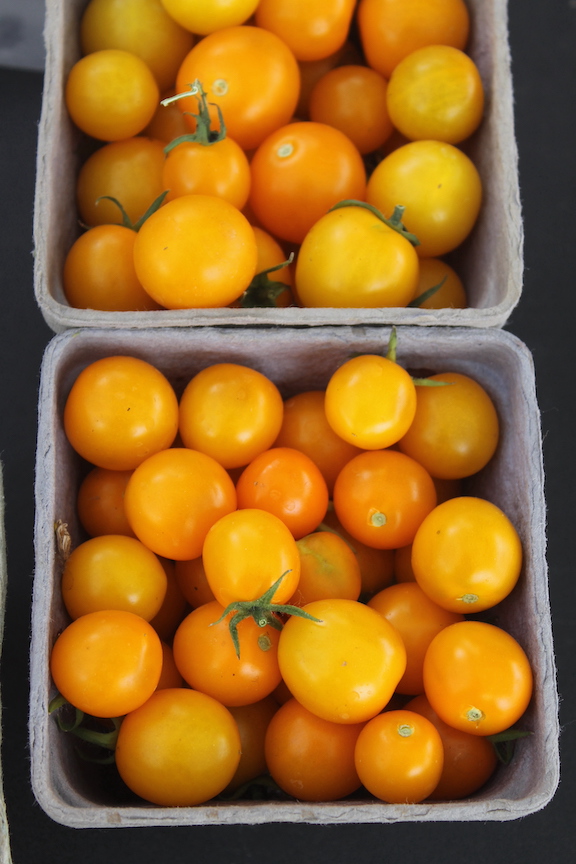
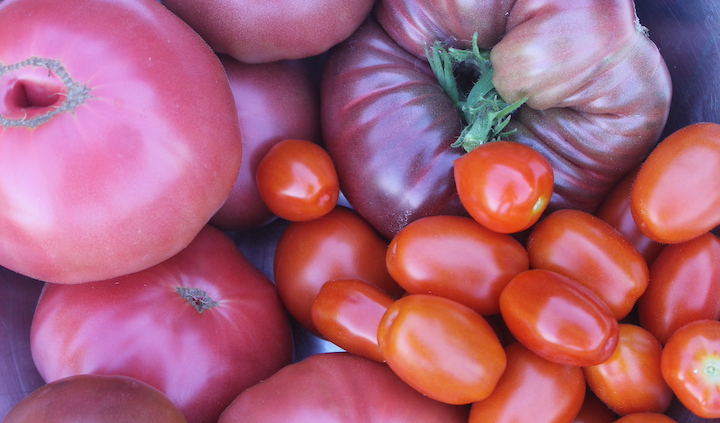
Aside from being tasty and easy to grow, tomatoes come in a dazzling array of colors, types and growth habits. Shades of yellow, orange, pink, purple, chocolate and white come from several pigments that become more pronounced with maturity as the underlying chlorophyll fades out. In addition to the big red salad types, there are cherry tomatoes, long narrow paste varieties and hollow-fruited sorts for stuffing — not to mention long-keepers which are hard and green at harvest and by January have begun to yellow outside while the interior has turned a more familiar red.
Whether or not you need to stake them, trellis them or just let them sprawl depends mainly on their growth habit. So-called determinate types will grow to a certain height and their lateral buds will take over and make for a bushy plant (which by the way tend to be earlier maturing). Indeterminate varieties will simply keep growing upward (assuming support is there). They may also make lots of laterals but the apical, or tip, buds will continue to grow, sometimes over 15 feet in warmer climes than Maine. One may prune those laterals to encourage apical growth, but the corollary is not true: if you remove laterals from determinate types they will not grow taller, they’ll just continue to bush. Determinate types can be grown without support; however sprawling plants are harder to access and fruits are more susceptible to blossom-end rot, especially if unmulched.
Many tomato growers who start their own plants seed them as early as March or even February, but because my indoor starting conditions (unheated attached greenhouse) are less than ideal, I opt to plant in 72-cell seedling trays around mid-April. After a couple of weeks, I transplant them into 50-cell trays or even 4-inch bark pots. I use my own potting mix: two-thirds veganic compost and one-third peatmoss, mixed and sifted.
If young seedlings are chilled in the early weeks they may be very slow to snap out of it even when things really warm up. My cousin, Tom Vigue, has a special method: He uses a soil-block mix with three sizes of plug-makers, saving greenhouse space and avoiding any transplant shock as the rootlets are never disturbed.
I sometimes hear people boasting of setting out purchased plants so advanced they have a single tiny green fruit set on. I’m not envious, as those typically lose much of that earliness advantage and in fact have a poorer overall crop yield because the plant has begun to invest energy in the single precocious fruit at the expense of root development and overall fruit yield throughout the season. I prefer less lanky, stockier plants; they’ll make up the top-growth soon enough. Now I know some people prefer leggy plants because they can lay them down sideways in the furrow and the buried stem will root from adventitious cells along its length for greater vigor. However, I prefer to trowel a deeper hole to set the plants more upright. Sidewise planting leaves the shallower roots more vulnerable to drought, plus when you bend the top upward as to stake it upright, it stresses the stem more, sometimes snapping it altogether.
I’m also careful to hold off planting tomatoes, not only until frost danger has passed, but until the outdoor soil has warmed enough for the plants to be immediately comfortable.
One of the biggest problems at the very outset is cutworms. I used to have bad infestations, but this is how I got the problem under control (not rid of, mind you, but under control): diligence. Cutworms attack at night, so in the early morning I’d go out and patrol the patch, plus any other crops which they bother, destroying any cutworms I find. You can spot the felled plants at a glance and the culprit is never more than a few inches away, curled up within an inch of the soil surface. I very rarely find more than one per spot, and if I’ve been derelict and there are several missing plants in a row, I can just look at the most recent victim — it may still be green and not very withered but toppled nonetheless. But the trick is to stay on top of the issue so that most of your attackers are destroyed the very first morning, leaving progressively fewer the next few mornings. Of course, you need a lot more replacement plants the first year but once you’ve got them under control, it’s much easier to keep them under control even in ensuing years. Take a week’s vacation at that time and all bets are off.
A more preventive strategy is to place a toothpick (or matchstick or twig) in the soil right close to the stem. The idea is that cutworms work by wrapping their whole body around the stem and that woody bit thwarts them. Sometimes they manage to insert themselves between stick and stem or to climb above the stick and cut the stem off higher up. For small gardens cardboard collars can also be very effective, but for larger plantings I find them less practical.
Flea beetles are also an early problem for which I sometimes use sifted wood ash or Pyganic, but better yet I spray a fine mist of rhubarb leaf extract (chop leaves, boil and strain) onto the foliage and repeat when dry. Once the tomato plants are established I don’t find flea beetles to be a problem.
I’ve only found tomato hornworms to be a problem in the last few years and not usually then. Handpicking is effective but tedious, and my old eyes often have trouble distinguishing them from the foliage. DiPel works very well if I’m vigilant in spotting them and acting promptly.
Tomatoes are susceptible to a number of diseases, but fortunately many of their prevention strategies overlap. Mulching from the very beginning can avert many problems, though I also like to plant a living mulch of red clover among them which isn’t as effective for disease control. Avoid overhead watering in favor of drip-tape. Prune lightly, especially suckers which impede airflow; likewise avoid crowding plants to let sunlight in; remove any lower leaves or shoots which begin to show senescence or disease; rotate at least three years between tomatoes or related crops like peppers, eggplants or potatoes; avoid excess nitrogen like chicken manure (or for that matter, any manure) and assure adequate calcium — like lime, although wood ash is a decent source provided it doesn’t throw of the calcium-potassium balance. These practices are all indicated for all or most of the usual diseases — alternaria, septoria leaf spot, anthracnose, etc. No one, including yourself, should ever be allowed in your garden carrying tobacco products on their person, as spores of tobacco mosaic virus shed everywhere and affect several crop plants including tomatoes.
There is one practice I use which conflicts with usual advice. Everyone says that late-blight-infected vines should never be put in the compost heaps, but instead burned, hauled away, etc. Not me: mine all go to compost along with other disease- and pest-ridden crop residues and I seem to have no ill consequences. Dumb luck maybe, but I believe it’s mainly because I manage my compost heaps so that everything reaches a temperature of 170 degrees Fahrenheit which seems to destroy most problems. Were it not for that, I would probably have to rethink my residue-handling policy.
My western Maine farm is no banana belt, and I usually have lots of green tomatoes at harvest. That’s no problem as I spread them out on trays in the greenhouse where they after-ripen in the warm sun and I process them as they turn red. Another storage method is to pull up the entire vines, after picking or shaking the ripe tomatoes, and hang the plants by their roots (minus any loose dirt) from nails in the joists of my root cellar. There the fruit can after-ripen for several weeks until I pick them red from the vine or off the sawdust-covered floor.
About the author: Will Bonsall lives in Industry, Maine, where he directs Scatterseed Project, a seed-saving enterprise. He is the author of “Will Bonsall’s Essential Guide to Radical Self-Reliant Gardening” (Chelsea Green, 2015). And indeed, he is also a distant cousin of another exemplary Maine horticulturist: Tom Vigue. You can contact Will at [email protected].
Note: Certified organic producers should check with their certifier before using any pesticides not mentioned on their organic farm plan. When using pesticides on crops grown commercially and intended for human consumption, an applicator’s license may be required.