 |
| Toki Oshima drawing |
By Tom Roberts
I get excited about chips. Not potato chips or silicon chips, but wood chips. I believe they are a vastly underutilized resource on the organic farm.
Chips are coarser than the coarsest sawdust, shavings or shingle hair. They range in size from a quarter to a slice of bread. In general, we come into contact with three kinds of wood chips: industrial chips, bark chips and ramial chips.
The first I call “industrial” wood chips, those produced by disposing of old building materials, as a landfill or municipal transfer station might do. Industrial chips may contain nails, putty, treated and painted wood, and other items from old buildings. Nails can injure feet and tires; pressure treated woods contain leachable chromium and arsenic; lead can be present in old painted wood; other materials can include broken glass, plastic shards, asphalt shingles, drywall – in short, anything the workers down at the transfer station might decide to toss into the chipper. These items make the chips physically dangerous and biologically undesirable. On the other hand, if you know the chippers and they understand that the value of the chips they produce depends upon what they use as source material, you may find industrial chips useful. If you closely inspect the chips in question, undesirable components usually can be spotted quickly. Although they have their place on an organic farm (such as firming up woods roads), the uses of industrial chips are few and they need to be used with care. In general, I refuse industrial wood chips unless I am pretty sure of the source materials.
The second type is bark chips, often available from log processing facilities such as saw mills. These make great mulches on many perennials, as the tannin in them makes them long lived and their dark color is attractive. They are very low in nitrogen. You do NOT want to till them into your garden soil. They are generally available only by purchasing them either bagged or in bulk, from the producer, garden centers or nurseries. Occasionally you can find an unwanted pile at a sawmill, where they are considered a nuisance.
Ramial chips, though, are the ones that really excite me. Ramial chips come from trees and brush, from branches up to about 4 inches in diameter with or without leaves. A fairly high percentage of their mass is thin young bark, young wood and sometimes leaves.
I categorize ramial chips based on use : summer chips (with leaves); spring, fall and winter chips (without leaves); and evergreen chips (with needles). Sub-categories include cedar chips (long-lasting, poor composters), alder chips (fast rotting, good mulch), and so on. I use ramial chips most, so I will just refer to them as “chips” now.
After experimenting with chips for several years, I was greatly encouraged to read about ramial wood chips in the Dec. 1998-Feb. 1999 issue of The Maine Organic Farmer & Gardener (“Ramial Chipped Wood,” by Celine Caron, G. Lemieux and L. Lachance of Laval University in Quebec). A subsequent search of the web revealed that these authors are doing the primary work in this field; not much is being written on using ramial chips. Work by professor Gilles Lemieux and others at Laval University can be accessed at www.sbf.ulaval.ca/brf/regenerating_soils_98.html and www.sbf.ulaval.ca/brf/the_hidden.html, from which I quote:
Jean Pain has written a good book on using chips. He composts them on the Mediterranean coast of France. He chips in the rain when he can to assure the pile has enough moisture, and runs black plastic pipe through the pile to supply his home with hot water for months. Then he uses the rotted chips in his gardens. His book is “The Methods of Jean Pain: or Another Kind of Garden.” A Google search for “jean pain” yields plenty of websites about Jean’s work, mostly in French.
Fresh ramial chips can be tilled directly into the soil, used as mulch, or they can be composted. The most informative articles and most interesting research concern incorporating chips into the top layers of the soil. When composting, chips are broken down by bacteria prevalent in garden soils; when uncomposted chips are incorporated into topsoil or used as mulch, far more complex fungal systems prevalent in forest soils do most of the decomposing. Often, which you do depends on the management plan of your farm.
How Do You Get Chips?
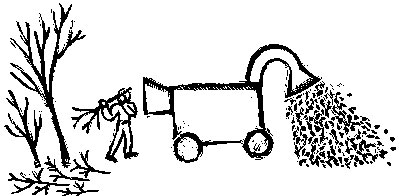
You can use your own chipper or rent one, available from most equipment rental shops. Chipping is hard on equipment, so don’t chip any quantity with a light duty chipper, such as a Kemp shredder. You need a piece of equipment whose primary purpose is to chip wood. We have a Finnish Patu 4400 PTO powered chipper that makes nice, quarter-sized chips from brush up to 5 inches in diameter. But be forewarned: You need a large pile of brush to make a small pile of chips, which is great if you want to get rid of your brush pile, but not if you want to manufacture lots of chips.
To encourage nearby folks to bring us material for composting, we made a brochure describing what we accept at our farm, such as chips, leaves, grass clippings, sawdust and so on. (See our website, snakeroot.net/farm/WeWantYourLeaves.shtml.) We leave this brochure at the transfer station and the town office and hand it out at the farmers’ market.
The most productive way we have found to obtain chips is to stop at any nearby roadside brush chipping that we see going on. Letting the crew know that you will take ALL the chips they ever have makes their life easier, since once the truck is full of chips, they have to stop work because they have a disposal problem. We solve that problem and thank the crew with a few tomatoes, a bag of carrots, or some such gift each time they drop us a load.
 |
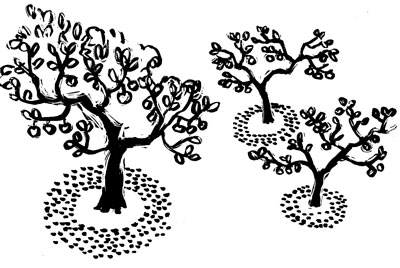
| Young and old apple and pear trees like a 4- to 6-inch-deep chip mulch. Keep the mulch 1 foot from the trunk and go out to the drip line. Toki Oshima drawing. |
How Can You Use Chips? Let Me Count the Ways …
Simply piled alone, chips store well, and in five years will look almost the same as they did the day they were piled. Summer chips (with green leaves) will heat up and rot down a bit, but chips have so much more carbon than nitrogen, even with their leaves, that the brief period of initial heating soon subsides. Of course this depends somewhat on the type of woods being chipped, but getting more chips than you can use in a year or two is no real problem if you have a place to store them. Piles of chips are very porous, so they dry out quickly on their own unless covered with a tarp, straw or hay. Since drying is preserving, simple piles of chips don’t compost, they keep.
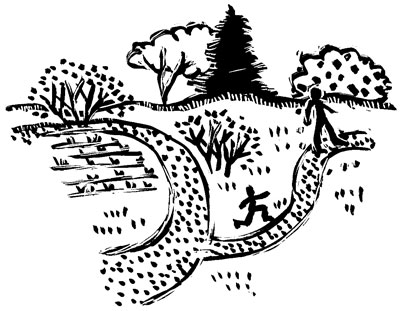
Winter and evergreen chips can pave greenhouse and outdoor workspaces to avoid the mud that would otherwise be underfoot. They make a soft, carpet-like floor that is pleasant to walk and stand on. Walking on a 4-inch layer of chipped spruce boughs is pleasantly aromatic for months.
We have spread chips with the manure spreader to firm the surface on highly trafficked areas of our field roads. They also make good fill for potholes and low areas in farm roads, as the grass sends roots in and the chip fill is quickly part of the surrounding ground. We have also used them on our woods roads to firm wet areas and fill ruts.
As a mulch, chips need to be used with forethought. As an annual mulch, where the mulch will be turned under at the end of one season, a 2-inch layer of chips once tilled under tends to tie up nitrogen for about a year. While acting as a mulch, chips retain soil moisture, keep the soil cool, suppress broadleaf weeds and encourage earthworms. Alder or willow chips make the best annual mulch, since they rot so quickly.
 |
| Toki Oshima drawing |
As a perennial mulch – even when used as a permanent mulch between beds of annuals – chips work very well on broadleaf weeds. For grasses, use a heavy underlayer of cardboard or newspaper before applying the chips. Corrugated cardboard and pizza boxes work well, as long as they lie flat and overlap at least 3 to 4 inches. Larger pieces create fewer seams. Apply newspapers at least about 24 sheets thick. Be sure newspapers and cardboard lie flat to eliminate “windows” through which grasses can easily grow. So many layers of newspaper are needed to provide a sufficient barrier to grass roots. If existing grasses or weeds make the area too lumpy, an initial weeding or close cutting with a weed whacker or lawn mower may be necessary.
To get your cardboard or newspapers to lie flat more easily, leave them out in a heavy rain or soak them in a tub or wheelbarrow overnight. Newspaper expands about 50% when soaked, so if you fill a 5-gallon bucket with newspapers and add water, the next day you will spend the better part of an hour getting them out. If you use the rain-soaking method, remember that even a heavy rain will soak through only about a half inch of newspaper, so spread them out for their rain soaking or toss a bundle of newspapers into an unused corner of the garden or under the dripline of the house eaves, to be used in a month or two. In the fall, we have left an 8-inch-thick bundle of newspaper outdoors where they were to be used for mulch. The next spring, some of the middles of the center papers were still dry.
Once you have a good supply of wet newspaper or cardboard, pave the area to be mulched with them, overlapping a good 3 to 4 inches. This always takes more material than you think it would, but don’t skimp. An additional advantage to soaking this first layer means you can cover a large area without fear of the wind blowing it away. Once you have a section mulched, start pouring on the chips.
Use enough chips to at least cover the underlayer completely, but the more the better. Think 3 to 4 inches. Make sure the chips completely cover the edges of the underlayer, as well. The chips will protect the underlayer from drying out, and the underlayer will gradually decompose from microbial and earthworm action. This will take about a year, and in the meantime most of the grasses under the mulch will die. I am still amazed, after applying a thick layer of newspaper, to poke a hole through the chips the following year to find hardly a trace of the underlayer left. Any grasses that do poke through the next year will probably be grasses with rhizomes, such as quackgrass. These will be easy to pull up along with their long rhizomes, as long as you do it early and don’t let them establish a huge mass of rhizomes. Using a hand-held weeder with sharp, narrow prongs, you can pull up long strings of rhizomes with much satisfaction in early spring, when the soil is moist. Many of these will not have originated from the mulched area but will be invaders from surrounding unmulched sections. To keep these invaders at bay, we rototill around the edges of the garden several times a season.
Young and old apple and pear trees like a 4- to 6-inch-deep chip mulch. Keep the mulch 1 foot from the trunk and go out to the drip line. Since we grow peppermint and spearmint under our trees, and since grasses don’t do well under trees anyway, we don’t use an underlayer under our fruit tree mulches.
All of the work done on building soils with ramial chipped wood recommends tilling the chips directly into the soil. I have done this sometimes, usually followed by a cover crop. When tilling in 2 inches of popple chips, I saw temporary (one-year) signs of nitrogen deficiency (poor crop growth, small plants with yellow leaves). By the second year these signs disappear. This may have been due to the large amount used and the rather large size of some of the branches chipped. In the future, I will directly till chips into the soil using popple, alder and other mixed woods in separate sections, and chipping smaller diameter wood. The research quoted above showed that ramial chips from climax trees (oak, maple, yellow birch, beech) produce the best soils, while ramial chips from conifers are the least beneficial.
Mixed with cow manure, chips take more than a year to digest, so we no longer use them this way. However, over the past two years we have discovered that grass clippings have the necessary nitrogen to make chips “disappear” within a year when mixed at the rate of one part grass to two parts chips, by volume, and turned a few times. Such piles get VERY HOT very quickly. Last summer’s pile was 6 feet high and 30 feet long and could be seen emitting warm vapor in the cool of morning and evening.
How do we get so many grass clippings? Organic farms should be the end of many waste streams and the beginning of few. We get two to three pickup loads a week by letting a lawn care business know we will take all he has, “any daylight hour seven days a week.” We have even given him some “$2 Thank-You Coupons” good at the local farmers’ market to hand out to his lawn care customers. On the coupon we explain that the customer’s clippings go into our compost pile to grow our vegetables, so we are thanking them for helping us grow our crops.
NOTES:
Developing a good relationship with various potential suppliers of organic materials to your farm is important. Often the very materials they undervalue are exactly the ones you need, but this must be explained to most people. These relationships and educational conversations become part of the bonding between the farm and the community.
One design aspect that we integrated into our farm yard was a large turn-around area, where cars, pickups and chipper trucks, even with trailers, can maneuver with ease. We want to assure folks who are good enough to haul in free materials that they’ll have an easy time at this end. This is part of our “pay” for having dozens of folks “working” for us by gathering and delivering their organic matter.
Homeowners can supply leaves and grass clippings. Professional leaf rakers can provide whole and shredded leaves and pine needles. Local dairies can provide baling twine for trellising, mulch hay and, of course, manure. Often manure that has hay mixed with it is not good for spreading on hayfields because the clumps of old hay will interfere with this year’s mowing, so dairy farmers are glad to get rid of it.
Municipal transfer stations can be sources of leaves and will often direct residents to your farm to get rid of the bulky organic “waste” products they find so hard to dispose. An excess of leaves is no problem either. We have a five-year-old “leftover” leaf pile that is the source of the much valued leaf mold we use in our potting mix and greenhouse planting beds.
To ensure that the grass clippings that we compost do not contain herbicide residues, we grow tomatoes on the compost pile for a year. Tomato plants are good indicators of herbicide damage. If no damage is apparent, the compost is fine. Chlorpyrifos is the only persistent herbicide I know of that can survive the composting process, and most home uses of this herbicide were banned recently.
Most of the grass clippings and leaves that we receive have been collected in bags attached to mowers, so they do not have animal feces or other debris that tends to nestle down next to grass roots.
Alders are great candidates for chipping, since many farms have access to wet areas where alders are abundant. They resprout quickly and are ready to harvest again in five to seven years. Alders have nitrogen fixing bacteria growing on their roots, so they can derive nitrogen from the air. This enables them to grow in nitrogen-poor areas, but it also means that harvesting them allows you to access an otherwise unavailable nutrient source. I have used alder chips as mulch and as an addition to compost; they rot so fast that there is almost no trace of them the following year.
About the author: Tom Roberts has been farming organically since 1980. Tom and partner Lois Labbe grow vegetables and herbs on 2 acres of fields and in four greenhouses at Snakeroot Organic Farm in Pittsfield. Their farm tour day is the second Sunday in July each year. Website www.snakeroot.net/farm

